

Price Tag: $1,250 - $2,650

Williams Sonoma Home: Sutton Bed
Price Tag: $2,250 - $8,650

Chopsticks & Pearls DIY Weekend Project
Price Tag: $60
Step 1: Purchase your supplies & measure your ideal headboard size
Supply List:
2 Yards of Fabric (will work for any size headboard). Of course, I loved an expensive fabric. Make sure and look for coupons before you shop. I found a 40% off coupon online!)
Nailhead Trim Kit - Make sure and buy the "kit" and not the individual nailheads. Trust me. I learned the hard way this weekend. It's MUCH easier to nail every 4 nails.
Plywood - If you want to make a square headboard, most hardware stores will cut the exact size you need. If you want to make rounded edges and your husband is anything like mine, you might need to ask a carpenter or handyman to cut it our. :) I also used a 3/8th inch plywood because I didn't want to drill holes in the wall to hang..I wanted something light. You can get a much thicker plywood (1 1/2 inch) if you want a sturdier look.
Mallet - I would use a mallet over a hammer because a hammer can dent the look of the nailheads
Batting - I purchase two yards of standard batting from the fabric store.
Staple Gun - I had this already!
Picture Hanging Kit - I used a 30 pound picture hook to mount the headboard on the wall.
Wire Cutters - To cut the nailhead trip and picture wire
Screwdriver
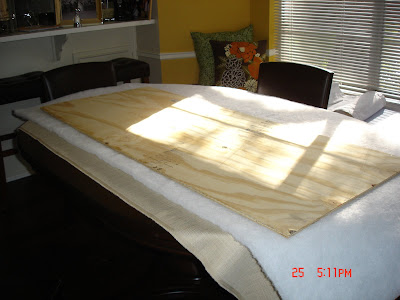
3. Step Three: Use a staple gun to attach the fabric and batting to the plywood. Make sure you pull the fabric pretty tight around the edges.


4. Step Four: Hammer the nailheads around the headboard. I did this on our dining room table and used a quilt to protect the table from any scratches etc. Also, the nailheads can be sharp....especially when you cut the ends. Make sure you don't cut yourself. If so, use a bandaid - you don't want to get blood on the fabric. Trust me on this one......

The picture below is when I tried to nail each nailhead individually....huge mistake! It took forever and it wasn't in a straight line. After all those mission trips in college building houses and hammering nails, I STILL a bad nail hammer-er.

Thank goodness for nailhead trim!!!!

5. Step Five: Attached picture wire to the back of your headboard. I didn't have to use a drill for these screws. I was able to push them through with a screwdriver. Yes - I realize I need a new camera.

6. Hang your headboard and admire your hard work!!!!

My plan is to get a new white coverlet for this bed, two white shams, and one or two green decorative pillows. I'm going to eventually change out these old side tables for a darker wood look to match everything else in our house!
Now..not only do I have a new headboard for our guest room, but I have money left to spend on another surprise project next weekend! Stay tuned!


AAAAAAAAAAAAAAAAAA!!!!!!! I love it!!!!! Aaaaand, I love how you showed the expensive ones first!!!! Awesome!!! (not to mention the not getting blood on the fabric...hahahahaha!) Oh man, this is why we're friends.
ReplyDeleteIt looks awesome! I am so glad you are updating again, so I can continue my stalking;) See you on Saturday!
ReplyDeleteok, i might actually try this! i'm so impressed with you and we don't have a head board right now.
ReplyDeletebeautiful work!! where did you find the nailhead trim kit?? i'd love to try this!
ReplyDeleteThis is gorgeous! I may try this for my guest room!
ReplyDeleteLove it!!! Check out mine too, same project- slightly different result. Yours is lovely!
ReplyDeletehttp://design-aholic.blogspot.com/2009/09/afternoon-headboard.html
What a FANTASTIC headboard! I LOVE IT!
ReplyDeleteLayla
Hi,
ReplyDeleteI love your headboard and I'm about to start one of my own. I was wondering how many nail kits you bought? Also, did you omit the foam behind the batting? If so, is the board still comfortable?
Thanks and great job!!!
Where can i buy the nailheads from in Toronto?
ReplyDelete